Cloudflare Tunnel
Requirements and Enabling
-
You will need to first generate a token by following the steps here
a. You can find the token here:

-
Once you've generated the token, update the
cloudflare_tunnel_tokenvariable ininventory/group_vars/all/cloudflare.ymlwith the newly generated token -
Enable the container in
inventory/group_vars/all/container_map.yml -
After the container has been started, you should now see an active Connector in your Cloudflare dashboard
-
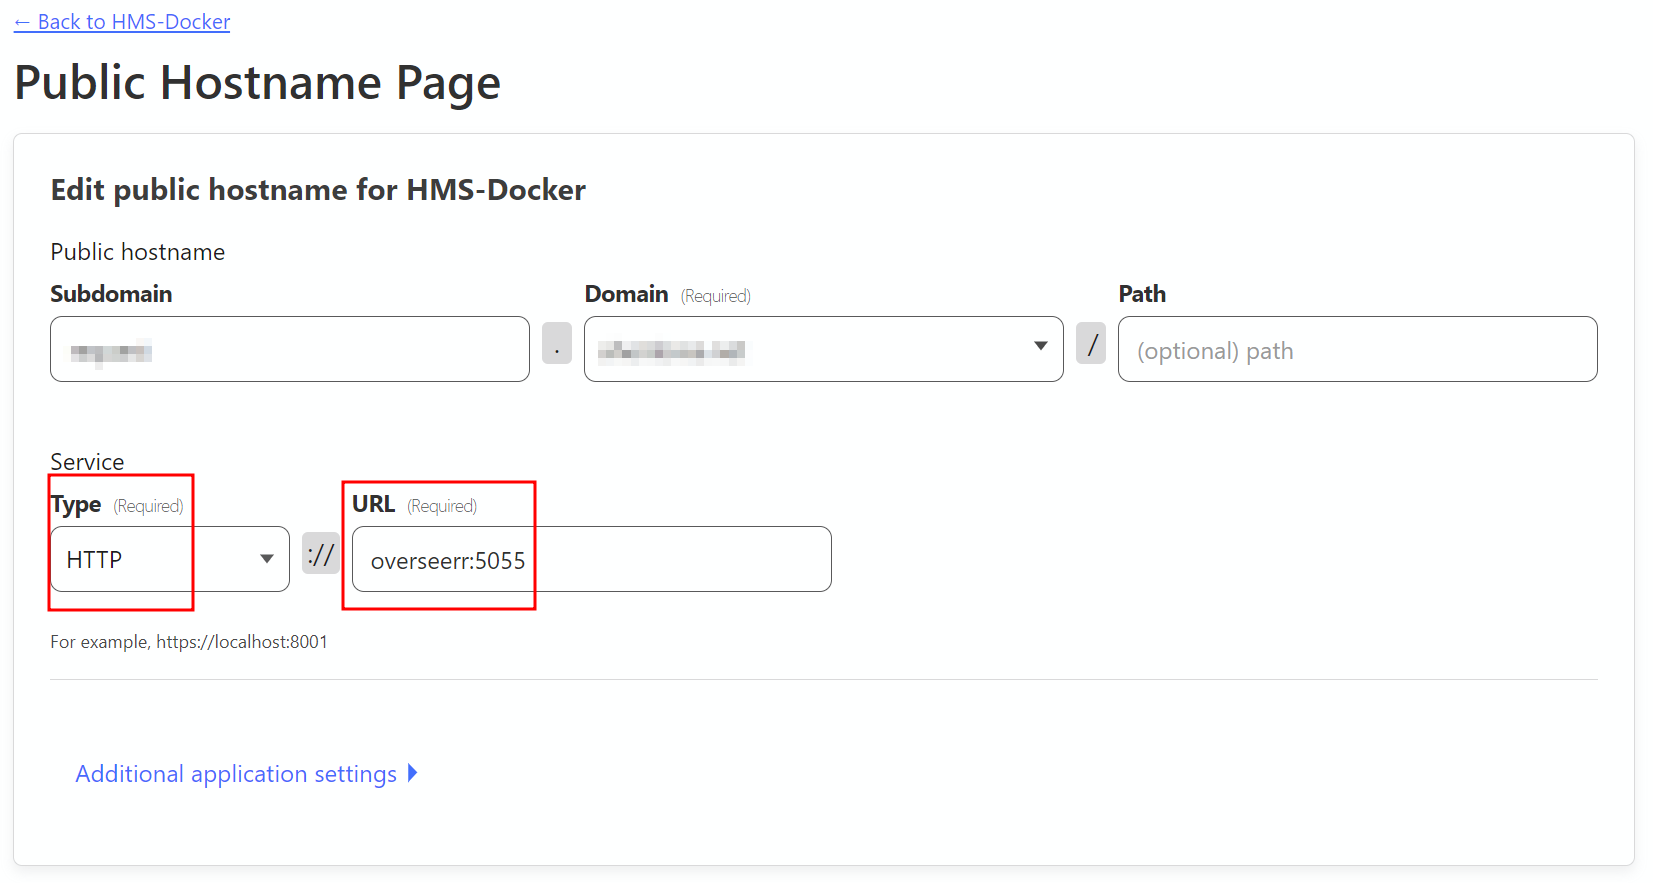
Follow the steps here to link containers to the tunnel, following the container map for the available container names and ports (use the container name as the "Service" name in the Cloudflare webgui, and append the port, e.g.
overseerr:5055)
Traffic does NOT pass through Traefik first for this request flow, so no security controls from Traefik will be applied, such as the IP Allowlist controls since the request is seen as coming from the Tunnel container, which falls into the RFC1918 private address space
I am not responsible for any misconfigurations that may insecurely expose your applications. It is your responsibility to understand and accept the risks and implement security controls where possible.
Example:
Important Notes
The "public hostname" subdomain you use does not need to match any Traefik proxy rule as this traffic does NOT pass through Traefik, it goes directly from the container -> Cloudflare Tunnel via the internal Docker network.
This also means that SSO using Authentik will not work for any container individually configured to go through the Tunnel by default due to the authentication middleware being applied by Traefik.
In order to use Authentik with a container through the Tunnel, you will need to port forward or see below for more information
Using Authentik through Cloudflare Tunnel
See the Authentik docs for this project